
Phase 1. Sketch Up.

All that considered the initial sketch turned out relatively strong, there are a number of issues I will discus shortly but on the whole not much changes between here and where the final piece ends up. At least, in terms of technique things move significantly forward but I’m getting ahead of myself again.
The other thing that I think is worth noting is that this is the only version of the sketch that has shading. Its being used as a bit of a quick and dirty crutch, expressing shapes quickly without worrying to much about creating perfect lines. Having read any of my recent posts where I talk about using light and shadow to create shapes why then worry about how the lines look in the sketch? The main reason is that if I’m going to transfer the image to the mat having crisp perfect lines make things so much quicker, I can always ignore good lines when they are in place but muddy indistinct lines make things more time consuming in the long run.
Phase 2. Colour Check.
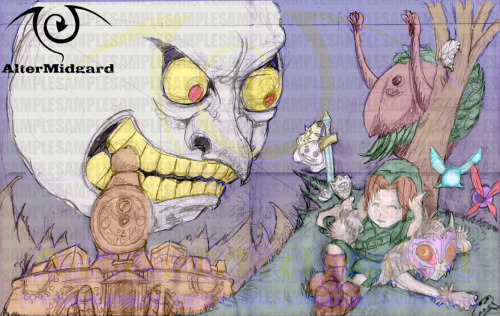
There are a number of colour choices that make it all the way through while others fall out of favor in the intival between this phase and the next. Meaning I put the design aside to concentrate on projects that were more pressing.
Phase 3. Long Time No Sketch.
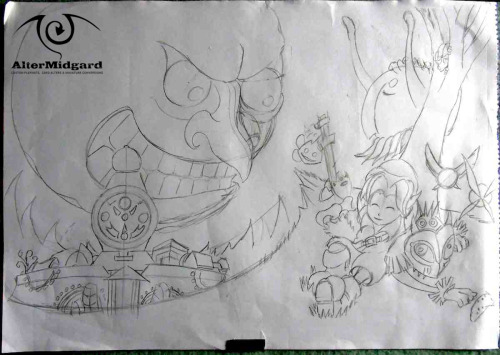
First up the moon isn’t exactly round in the original skect is it. Craters causing bumps aside that’s sort of an important thing to get right, as is the fact that the nose seems to be missing a nostril for some reason.
Next up while I want Clocktown to be slightly wonky and disturbing looking it would be nice if the clock tower was at least a little more symmetrical especially since the face of the clock itself preferably needs to be round.
The mountains have also changed, I realized that having them pointing all over the place wasn’t helping the flow of the eyes around the image so now they bend either left or right depending on the side they are on.
Finally inspired by the way I’ve drawn the giant I want to go for a style thats a bit more inspired by the current generation of western cartoons so smooth curves and long limbs are the order of the day. Having fixed those things and now with an image whose lines are much more obvious there are still some things that need sorting.
At the end of the day this is just a copy of the original with slightly adjusted lines if anything the level of detail has actually decreased.
Phase 4. Up Detail.
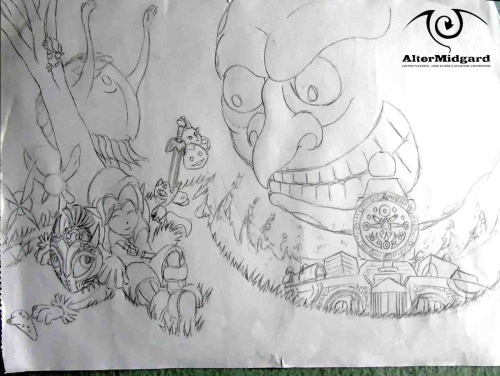
After changing the mountains the grassy area bellow the town just wasn’t working for me anymore so I adjusted it to follow the same curve as the moon. Now I found myself with an image thats made up of a series of concentric circles radiating out from the moon, not really what I was going for but you cant do golden spirals every mat i guess. While I’m undecided at this stage whether the town should be falling to pieces as the moon crashes down it’s clear having the mountains crumble adds a nice touch and helps connect the various circles.
The rest of the upgrade mainly involves adding detail and making as many lines as possible into S’s (just look at the moon’s face for a good example, especially the nose). This is also the first point in time where Skull Kid’s feet get fixed they should never have been both facing the same way, on the downside I will now need to redraw his hands before I move to the mat because they have lost detail somehow.
Phase 5. On The Mat
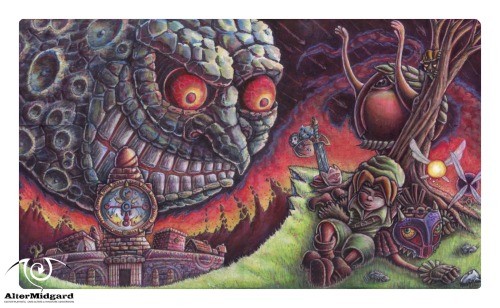
The only major changes after phase 4 are that I add in a bunch of craters to the non face section of the moon to make it more interesting and a rather intense fire suddenly appears from nowhere to act as a way to make sure the two sides of the image are definitely connected and to guide the eye up and around the page (and yes maybe to add a spiral back in).
I chose blue for the moons colour scheme in the end since I seem to have coloured quite a number of yellow moons it was a nice change and I figured the darker shades would look more sinister.
Not that Link seems to care, perhaps he’s finally ok with his perpetual groundhog 72 hours.